
Ultimate Spicy Herb-Infused Garlic Pickles
If you’re looking for a zesty, flavorful addition to your meals, look no further than Ultimate Spicy Herb-Infused Garlic Pickles. These pickles are more than just a condiment; they’re a delightful explosion of flavors that can elevate any dish. Packed with the warmth of spices and the fragrant aroma of fresh herbs, this recipe is sure to become a staple in your kitchen.
Key Takeaways:
- Preparation time: 30 minutes (plus 3 days for pickling)
- Difficulty level: Easy
- Main ingredients: Cucumbers, garlic, chili flakes, vinegar, fresh herbs
- Special techniques: Brining, infusion
- Storage information: Refrigerate for up to 2 months
Introduction to Ultimate Spicy Herb-Infused Garlic Pickles:
Pickling is an age-old preservation technique that dates back thousands of years, believed to have originated in ancient Mesopotamia. The process involves soaking foods in a brine solution, which not only preserves them but also enhances their flavors. Garlic pickles have long been a favorite in various cultures, celebrated for their tangy, crunchy characteristics and health benefits.
The Ultimate Spicy Herb-Infused Garlic Pickles take this tradition up a notch by infusing the classic garlic flavor with a medley of spices and fresh herbs. This recipe brings together the heat of chili flakes and the aromatic quality of herbs, creating a pickle that can stand on its own or complement a wide range of dishes. The combination of flavors is not just a treat for the palate; it also celebrates the art of pickling that has been cherished across generations.
In many cultures, pickles are more than just food; they are a symbol of hospitality and a staple at festive gatherings. These Ultimate Spicy Herb-Infused Garlic Pickles are perfect for sharing, making them a great addition to barbecues, picnics, or as a delightful snack on their own.
Ingredients for Ultimate Spicy Herb-Infused Garlic Pickles:
- Cucumbers: The main ingredient; select firm, fresh cucumbers for the best crunch.
- Garlic: Adds a robust flavor and aroma, essential for the pickle’s character.
- Chili flakes: Introduces heat; adjust the quantity based on your spice preference.
- White vinegar: Provides acidity; essential for the pickling process.
- Water: Used to dilute the vinegar and create the brine.
- Salt: Enhances flavor and aids in the preservation process.
- Sugar: Balances the acidity and enhances the overall taste.
- Fresh dill: Offers a fragrant herbal note; a classic herb in pickling.
- Bay leaves: Adds depth and complexity to the flavor profile.
- Black peppercorns: Imparts a subtle spice and enhances the overall taste.
Preparation Steps for Ultimate Spicy Herb-Infused Garlic Pickles:
1. Prepare the Cucumbers: Start by washing the cucumbers thoroughly under cold water. Slice them into your desired shape—spears, rounds, or leave them whole if they’re small enough.
2. Make the Brine: In a medium saucepan, combine 1 cup of white vinegar, 1 cup of water, 1 tablespoon of salt, and 1 tablespoon of sugar. Heat over medium heat, stirring until the salt and sugar have completely dissolved. Remove from heat and let the brine cool to room temperature.
3. Add the Flavorings: In a clean, sterilized jar, layer the sliced cucumbers, garlic cloves, chili flakes, fresh dill, black peppercorns, and bay leaves. Feel free to adjust the amounts of garlic and chili flakes based on your taste preferences.
4. Pour the Brine: Once the brine has cooled, pour it over the cucumber mixture in the jar, ensuring the cucumbers are fully submerged. If necessary, add more water or vinegar to cover the cucumbers.
5. Seal and Refrigerate: Seal the jar tightly with a lid and place it in the refrigerator. Let the pickles infuse for at least three days before tasting. The longer they sit, the more flavorful they will become.
6. Enjoy!: After the pickling period, your Ultimate Spicy Herb-Infused Garlic Pickles are ready to be enjoyed! They can be eaten straight from the jar, added to salads, or served alongside your favorite dishes.
Flavor Profile of Ultimate Spicy Herb-Infused Garlic Pickles:
The Ultimate Spicy Herb-Infused Garlic Pickles boast a dynamic flavor profile that is both bold and refreshing. The initial crunch of the cucumber gives way to a burst of tanginess from the vinegar, complemented by the pungent aroma of garlic. The chili flakes introduce a lingering heat that enhances the experience without overwhelming the palate.
As you savor these pickles, you’ll notice the herbal notes from the dill and the subtle warmth from the black peppercorns, creating a well-rounded taste that is both comforting and exciting. The balance of acidity, sweetness, and spice ensures that these pickles can elevate any meal while also being a delightful snack on their own.
Benefits of Ultimate Spicy Herb-Infused Garlic Pickles:
Ultimate Spicy Herb-Infused Garlic Pickles are not just a flavorful addition to your diet; they also offer several nutritional benefits. Cucumbers are low in calories and high in water content, making them an excellent choice for hydration. They are also a good source of vitamins K and C, as well as potassium.
Garlic, known for its numerous health benefits, contains compounds that may help boost the immune system and reduce inflammation. The presence of chili flakes adds potential metabolism-boosting properties, making these pickles a great snack for those looking to maintain a healthy lifestyle. Additionally, the probiotics formed during the pickling process can aid digestion and promote gut health.
Serving Suggestions for Ultimate Spicy Herb-Infused Garlic Pickles:
Ultimate Spicy Herb-Infused Garlic Pickles are incredibly versatile and can be served in a variety of ways. Here are some serving suggestions to inspire you:
1. As a Snack: Enjoy them straight from the jar as a crunchy, spicy snack.
2. Sandwiches and Burgers: Add these pickles to sandwiches, burgers, or wraps for an extra layer of flavor and crunch.
3. Charcuterie Boards: Include them on a charcuterie board alongside cheeses, meats, and other pickles for a delightful contrast of flavors.
4. Salads: Chop the pickles and toss them into salads for a tangy kick.
5. Tacos: Use them as a topping for tacos or fajitas to add a spicy and refreshing element.
Storage Tips for Ultimate Spicy Herb-Infused Garlic Pickles:
To ensure the longevity of your Ultimate Spicy Herb-Infused Garlic Pickles, proper storage is key. After sealing the jar, store it in the refrigerator, where the cool temperature will help preserve the pickles. They can typically last for up to two months in the fridge, although they are often best enjoyed within the first few weeks for maximum crunch and flavor.
If you want to keep them longer, consider canning them using proper canning techniques to create a shelf-stable product. However, the infusion of flavors may not be as intense as with the refrigerator method.
Conclusion:
Ultimate Spicy Herb-Infused Garlic Pickles are a delightful way to bring bold flavors and crunch to your meals. With their easy preparation and versatile uses, they are sure to become a favorite in your kitchen. So, gather your ingredients, follow the steps, and enjoy the delightful experience of homemade pickling. You won’t regret it!
FAQ Section:
1. How long do the pickles need to sit before they’re ready?
- The pickles should sit for at least three days to allow the flavors to develop fully.
2. Can I use other vegetables for this recipe?
- Yes! You can experiment with other vegetables like carrots, radishes, or cauliflower for a delightful twist.
3. How spicy are these pickles?
- The spiciness can vary based on the amount of chili flakes used. Start with a smaller amount and adjust to your taste.
4. Do I need to sterilize my jars?
- Yes, sterilizing your jars is important to prevent contamination and ensure the longevity of your pickles.
5. Can I use apple cider vinegar instead of white vinegar?
- Absolutely! Apple cider vinegar will give a different flavor profile, adding a hint of sweetness and complexity.
6. What’s the best way to serve these pickles?
- They are delicious on their own but pair wonderfully with sandwiches, burgers, and as part of a charcuterie board.
7. Can I add more garlic or herbs?
- Yes! Feel free to customize the recipe by adding more garlic or experimenting with different herbs you enjoy.
8. How can I tell if my pickles have gone bad?
- If you notice any off smells, discoloration, or mold, it’s best to discard the pickles. Always check for freshness before consuming.
Full Recipe
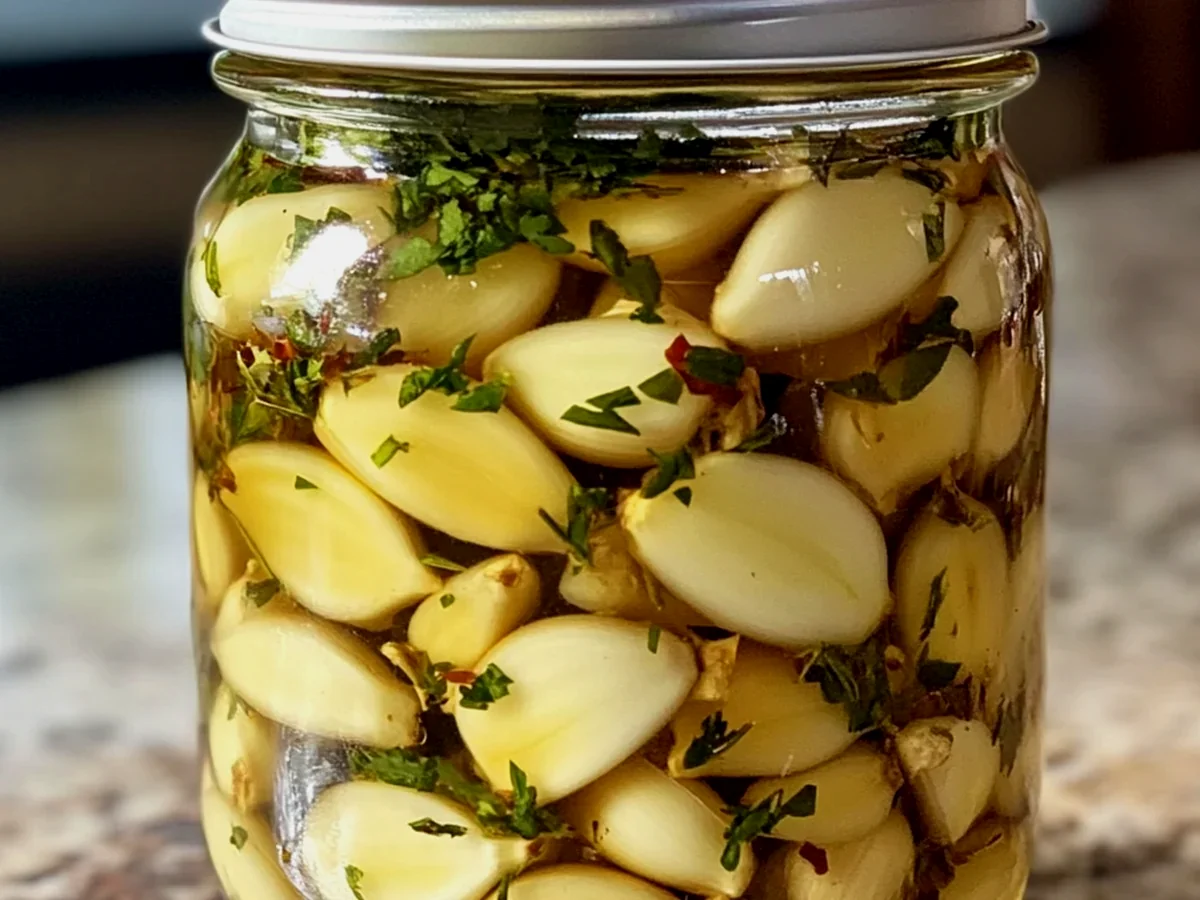
Zesty Pickled Garlic with Chili and Herbs

Ingredients:
- 2 cups garlic cloves, peeled
- 1 cup white vinegar
- 1 cup apple cider vinegar
- 1 tablespoon kosher salt
- 1 tablespoon sugar
- 1 teaspoon black peppercorns
- 1 teaspoon mustard seeds
- 2-3 dried red chili peppers (adjust to taste)
- 1 teaspoon dried oregano
- 1 teaspoon fresh thyme leaves
- 1 cup water
- Optional: 1 small carrot, sliced into rounds (for added crunch and flavor)

Instructions:

1. Sterilize your jars: Begin by boiling your glass jars and lids in water for 10 minutes to ensure they are clean and free of bacteria. Let them air dry on a clean towel.

2. Prepare the brine: In a medium saucepan, combine the white vinegar, apple cider vinegar, water, kosher salt, and sugar. Add the black peppercorns, mustard seeds, dried red chili peppers, oregano, and thyme. Bring the mixture to a boil, stirring until the salt and sugar dissolve. Once boiling, reduce the heat and let it simmer for about 5 minutes to allow the flavors to meld.

3. Pack the jars: Place the peeled garlic cloves in the sterilized jars. If using, add the sliced carrots for additional texture and flavor. Make sure to pack the garlic tightly but without crushing them.

4. Pour the brine: Carefully pour the hot brine over the garlic cloves, ensuring they are completely submerged. Leave about 1/2 inch of headspace at the top of each jar. If necessary, press down the garlic gently to keep them submerged.

5. Seal the jars: Wipe the rims of the jars with a clean cloth to remove any residue. Place the sterilized lids on top and screw on the metal bands until they are fingertip-tight.

6. Process the jars: For longer shelf life, process the jars in a boiling water bath for 10 minutes. Ensure the water covers the jars by at least an inch. Remove the jars and let them cool on a clean towel or cooling rack.

7. Storage: Once completely cooled, check the seals by pressing down on the center of each lid. If it pops back, the jar did not seal properly and should be refrigerated and consumed within a few weeks. Properly sealed jars can be stored in a cool, dark place for up to 1 year.

8. Enjoy: Allow the pickled garlic to sit for at least 2 weeks before consuming to develop the flavors fully. These zesty pickled garlic cloves make a perfect addition to salads, antipasto platters, or as a flavorful condiment for sandwiches and burgers.