
Ultimate Zesty Garlic Dill Pickles with a Kick
If you’re a pickle lover, get ready to elevate your snacking game with Ultimate Zesty Garlic Dill Pickles with a Kick. Bursting with vibrant flavors and a tantalizing heat, these pickles combine the classic dill taste with a spicy twist that is sure to excite your taste buds. Perfect for snacking, sandwich toppings, or as a side dish, these pickles are not just a condiment but a culinary adventure.
Key Takeaways:
- Preparation time: 30 minutes (plus 24-48 hours for brining)
- Difficulty level: Easy
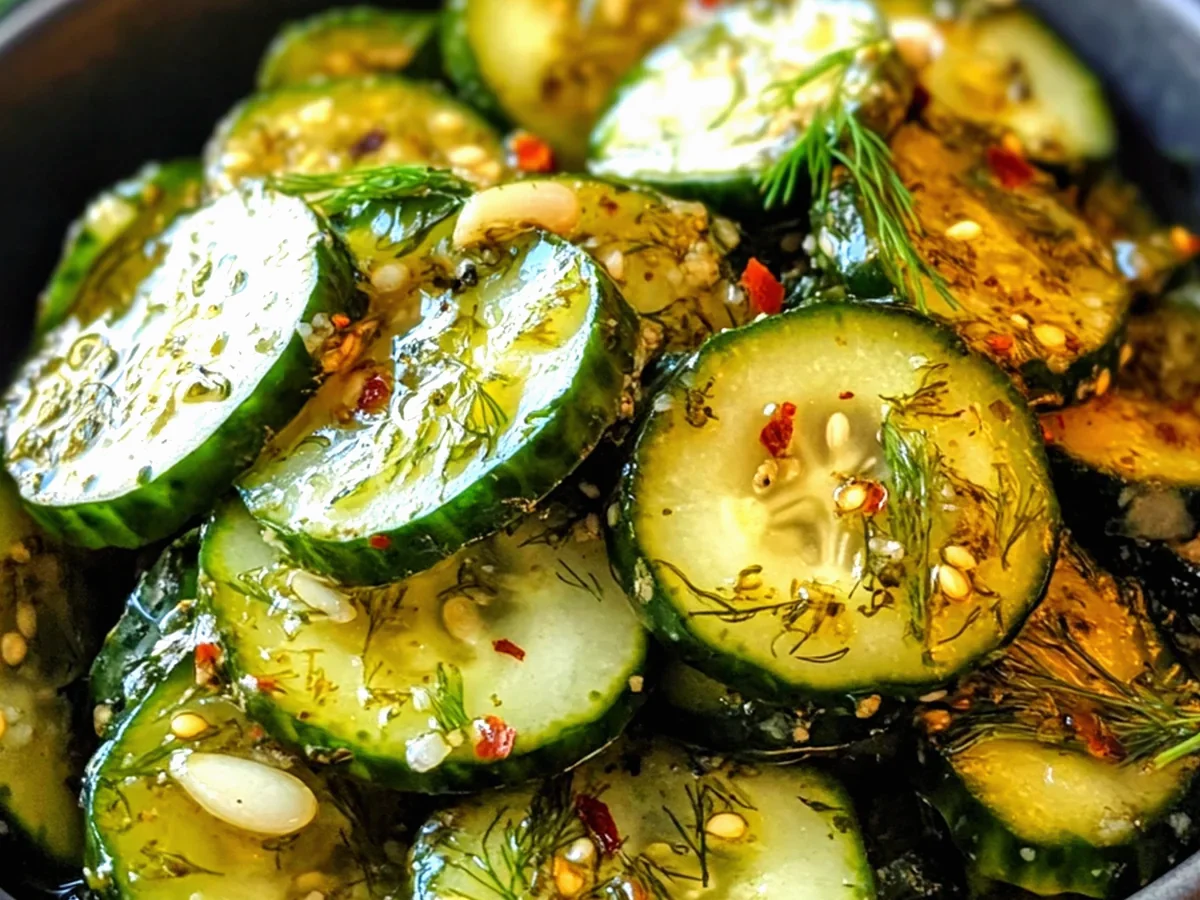
- Main ingredients: Cucumbers, garlic, dill, red pepper flakes, vinegar
- Special techniques: Quick pickling method
- Storage information: Refrigerate and consume within 2-3 weeks
Introduction to Ultimate Zesty Garlic Dill Pickles with a Kick:
Pickling is an ancient preservation method that has been used for centuries to extend the shelf life of vegetables and enhance their flavors. The origins of pickling date back to around 2400 B.C. in ancient Mesopotamia, where cucumbers were preserved in brine. Over time, various cultures across the globe have developed their unique pickling techniques and flavor profiles, often influenced by local ingredients and culinary traditions.
The Ultimate Zesty Garlic Dill Pickles with a Kick are a modern twist on the classic dill pickle. By incorporating zesty garlic and a hint of heat, these pickles not only preserve the fresh crunch of cucumbers but also add an exciting flavor dimension that appeals to both traditionalists and adventurous eaters. Whether you enjoy them straight from the jar or as part of a dish, these pickles are a celebration of flavor and creativity.
In the world of gastronomy, pickles have gained significant popularity, often featuring in gourmet dishes and artisan foods. They are no longer just a side item but a star ingredient in many culinary creations, showcasing how a simple vegetable can transform into something extraordinary. With the Ultimate Zesty Garlic Dill Pickles with a Kick, you can bring this tradition into your kitchen and share the joy of homemade pickles with your family and friends.
Ingredients for Ultimate Zesty Garlic Dill Pickles with a Kick:
- Cucumbers (4-6 medium-sized): The main ingredient, providing a crunchy texture.
- Fresh dill (1 bunch): Adds the classic dill flavor that is synonymous with pickles.
- Garlic cloves (4-6): Infuses the pickles with a robust flavor and aroma.
- White vinegar (2 cups): The acidic base of the brine, essential for preservation.
- Water (2 cups): Balances the vinegar for the brine solution.
- Salt (1/4 cup): Enhances flavor and aids in the pickling process.
- Sugar (1 tablespoon): Balances the acidity of the vinegar for a slightly sweet undertone.
- Red pepper flakes (1-2 teaspoons): Provides the kick and heat that sets these pickles apart.
- Black peppercorns (1 teaspoon): Adds a subtle spiciness and complexity to the flavor.
Preparation Steps for Ultimate Zesty Garlic Dill Pickles with a Kick:
1. Prepare the Cucumbers: Start by washing the cucumbers thoroughly. Trim off the ends and slice them into desired shapes: spears, slices, or leave them whole if you prefer whole pickles.
2. Make the Brine: In a saucepan, combine the white vinegar, water, salt, sugar, and red pepper flakes. Heat the mixture over medium heat, stirring until the salt and sugar are fully dissolved. Remove from heat and let it cool slightly.
3. Pack the Jars: In sterilized mason jars, layer the cucumber slices with fresh dill, peeled garlic cloves, and black peppercorns. For extra flavor, you can crush the garlic cloves lightly.
4. Add the Brine: Once the brine has cooled to a warm temperature (not hot), carefully pour it over the cucumbers in the jars, ensuring that the cucumbers are fully submerged. Leave a little space at the top of the jar.
5. Seal and Refrigerate: Wipe the rims of the jars with a clean cloth to remove any residue. Seal the jars with lids and let them cool to room temperature. Once cooled, place them in the refrigerator.
6. Brining Time: Allow the pickles to marinate in the refrigerator for at least 24 hours for the flavors to develop. For the best results, let them sit for 48 hours before tasting.
7. Enjoy: Your Ultimate Zesty Garlic Dill Pickles with a Kick are ready to be enjoyed! The longer they sit, the more flavorful they become.
Flavor Profile of Ultimate Zesty Garlic Dill Pickles with a Kick:
The flavor journey of these pickles is a delightful combination of tangy, savory, and spicy elements. The initial taste is a refreshing crunch from the cucumber, followed by a robust garlic flavor that lingers on the palate. The dill adds a classic herbaceous note that rounds out the profile, while the red pepper flakes introduce a subtle heat that builds gradually, making each bite exciting.
The texture is equally appealing, with the cucumbers retaining their crispness even after being submerged in brine. The pickles are juicy and satisfying, providing a perfect contrast to the bold flavors. The aroma is a tantalizing mix of garlic and herbs, inviting you to dive into the jar for more.
Benefits of Ultimate Zesty Garlic Dill Pickles with a Kick:
Homemade pickles offer several nutritional benefits alongside their delicious flavors. Cucumbers are low in calories and high in water content, making them a refreshing snack that helps with hydration. They also provide essential vitamins and minerals, including vitamin K, which is vital for bone health, and antioxidants that combat oxidative stress.
The fermentation process involved in pickling can promote gut health by introducing beneficial probiotics, especially if you use a fermentation method. Additionally, the garlic in this recipe is known for its immune-boosting properties and potential cardiovascular benefits.
Unlike store-bought pickles, which can contain preservatives and excessive sugars, these homemade pickles allow you to control the ingredients, making them a healthier option. Enjoying them in moderation can add flavor and crunch to your meals without the guilt.
Serving Suggestions for Ultimate Zesty Garlic Dill Pickles with a Kick:
The versatility of Ultimate Zesty Garlic Dill Pickles with a Kick makes them an excellent addition to numerous dishes. Serve them as a crunchy snack or appetizer alongside cheese and charcuterie boards, where their zesty flavor complements rich cheeses and cured meats.
They are perfect as a topping for sandwiches, burgers, or hot dogs, adding a refreshing crunch and a burst of flavor. For those who enjoy salads, chop them up and mix them into potato or pasta salads for an extra zing.
If you’re hosting a barbecue or picnic, these pickles can elevate your spread, providing a tangy counterpoint to grilled meats and hearty sides. You can also incorporate them into recipes, such as relish for tartar sauce or as an ingredient in sauces and dressings.
Storage Tips for Ultimate Zesty Garlic Dill Pickles with a Kick:
To ensure the longevity of your Ultimate Zesty Garlic Dill Pickles with a Kick, it’s essential to store them properly. Keep the pickles in the refrigerator after making them, as this will maintain their crunch and flavor. The pickles should be consumed within 2-3 weeks for optimal taste.
Always use clean utensils when reaching into the jar to prevent contamination. If you notice any signs of spoilage, such as off smells or mold, discard the pickles immediately. For longer-term preservation, consider canning them using proper canning techniques to seal them for months, though this will alter the flavor and texture slightly.
Conclusion:
Ultimate Zesty Garlic Dill Pickles with a Kick are not just another pickle recipe; they are an experience that brings bold flavors and delightful crunch to your meals. With simple ingredients and easy preparation, you can create these delicious pickles at home and impress family and friends. Don’t hesitate to try this recipe, and let your taste buds embark on a tangy, spicy adventure!
FAQ Section:
1. Can I use different types of cucumbers for this recipe?
Yes, you can use other varieties like Kirby or English cucumbers. Just ensure they are firm and fresh.
2. How spicy are these pickles?
The level of spiciness can be adjusted by varying the amount of red pepper flakes. Start with a small amount if you’re sensitive to heat.
3. Can I use garlic powder instead of fresh garlic?
While fresh garlic is recommended for maximum flavor, you can use garlic powder in a pinch. Use about 1/2 teaspoon per jar.
4. How long do these pickles last?
They can last up to 2-3 weeks in the refrigerator. For longer storage, consider canning them.
5. Can I add other spices to the brine?
Absolutely! Feel free to experiment with spices like mustard seeds, coriander seeds, or even a bay leaf for additional flavor.
6. Are these pickles suitable for a vegan diet?
Yes, Ultimate Zesty Garlic Dill Pickles with a Kick are entirely vegan-friendly.
7. What should I do if my pickles are too salty?
If the pickles are too salty, you can adjust the next batch by reducing the amount of salt in the brine.
8. Can I use this recipe for other vegetables?
Yes, you can use this brine for pickling other vegetables like carrots, radishes, or green beans!
Full Recipe
Crisp Spicy Garlic Dill Pickles with a Zing

Ingredients:
- 4 cups small cucumbers (Kirby or pickling cucumbers)
- 2 cups distilled white vinegar
- 1 cup water
- 1/4 cup kosher salt
- 4 cloves garlic, peeled and smashed
- 2 tablespoons dill seeds
- 1 tablespoon crushed red pepper flakes (adjust to taste)
- 1 tablespoon mustard seeds
- 1 teaspoon black peppercorns
- 1 teaspoon coriander seeds
- 4 sprigs fresh dill
- 1 tablespoon sugar (optional, for a hint of sweetness)
- 1/2 cup sliced jalapeños (fresh or pickled, to taste)

Instructions:

1. Begin by preparing your cucumbers. Wash them thoroughly and trim the ends. If desired, you can slice them into spears or leave them whole for a classic look.

2. In a large pot, combine the distilled white vinegar, water, and kosher salt. Heat over medium heat, stirring until the salt is fully dissolved. Remove from heat and let the brine cool slightly.

3. In sterilized quart-sized canning jars, layer the smashed garlic, dill seeds, crushed red pepper flakes, mustard seeds, black peppercorns, coriander seeds, and fresh dill sprigs evenly among the jars.

4. Add the sliced jalapeños to the jars, distributing them evenly. Pack the cucumbers tightly into the jars, leaving about half an inch of headspace at the top.

5. Pour the warm brine over the cucumbers, ensuring they are fully submerged. If using, add the sugar to each jar before sealing, stirring gently with a clean utensil to mix.

6. Wipe the rims of the jars with a clean cloth to remove any residue. Seal the jars with sterilized lids and bands.

7. Process the jars in a boiling water bath for 10-15 minutes to ensure proper sealing and preservation. Make sure the water covers the jars by at least an inch.

8. Once processed, remove the jars and let them cool completely on a clean towel or cooling rack. You should hear the lids pop as they seal.

Storage Instructions:
Store the sealed jars in a cool, dark place for at least 2 weeks to allow the flavors to develop. Once opened, refrigerate any unused portions.

Shelf Life:
When stored properly, these pickles can last for up to 1 year unopened. Once opened, consume within 2-3 months for the best flavor and texture. Enjoy your Crisp Spicy Garlic Dill Pickles with a Zing as a tangy snack, sandwich topping, or addition to your favorite charcuterie board!